Weekly Schedule ExampleSchool Classes Timetable

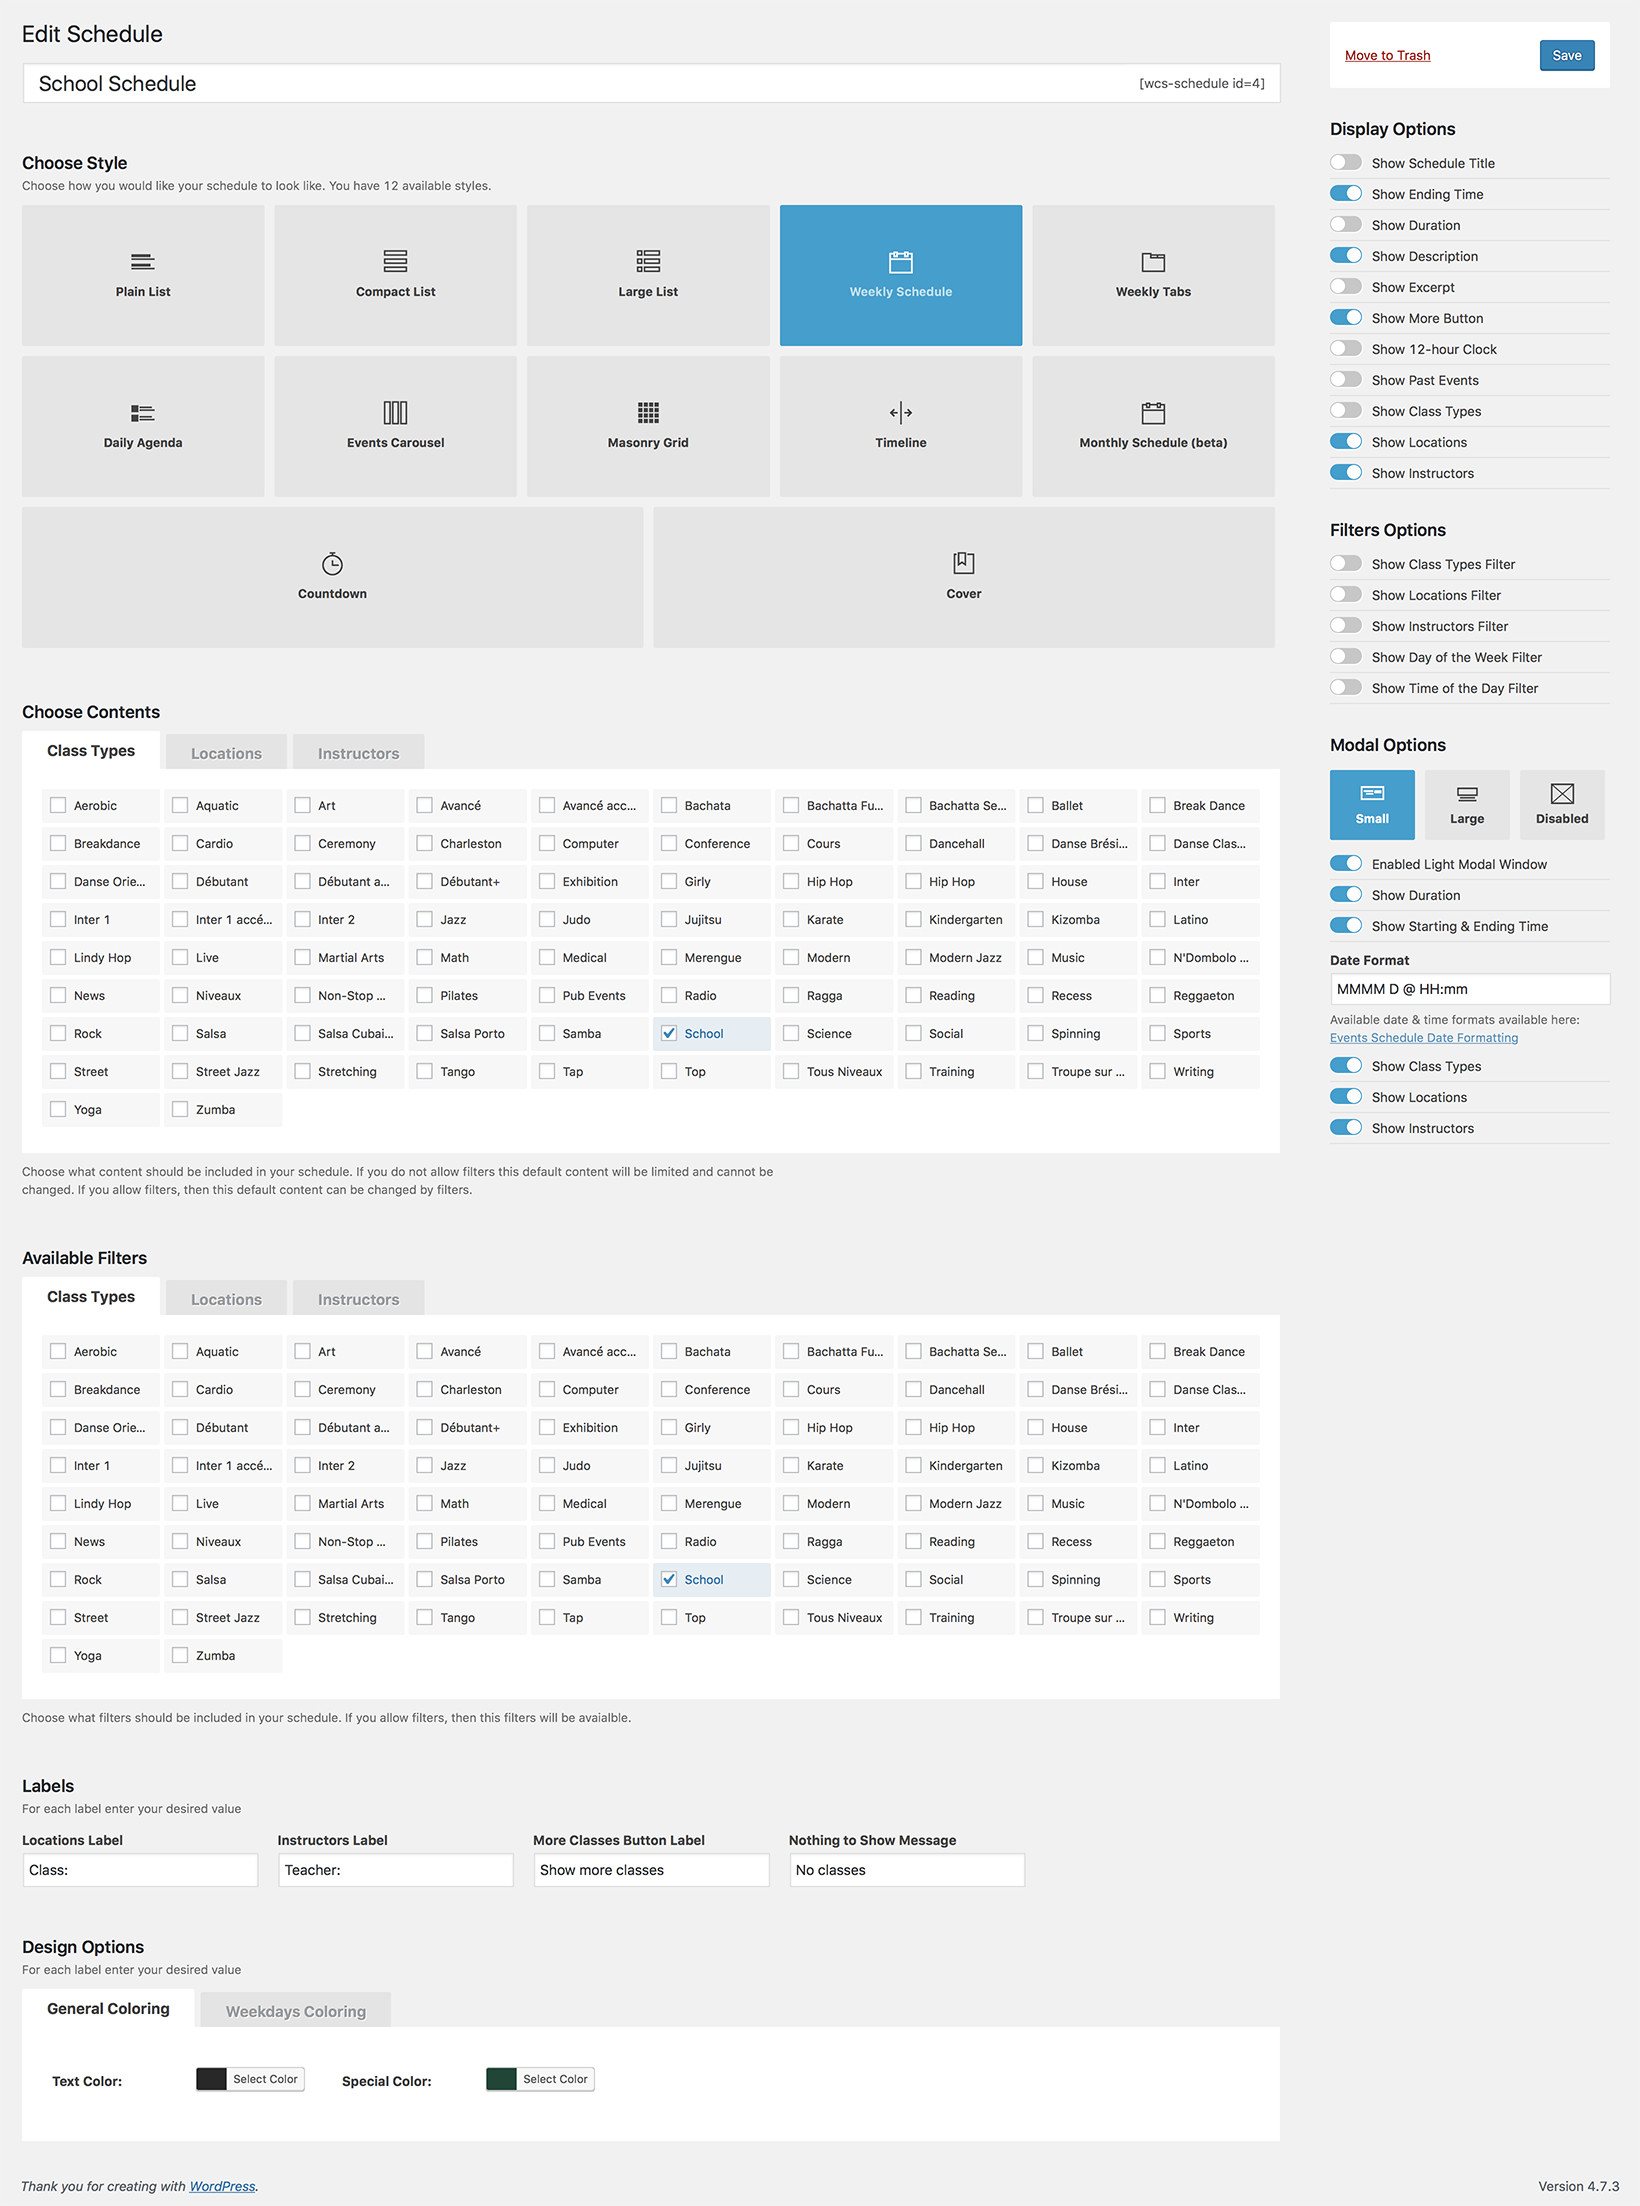
The Weekly Schedule is an easy way to display a School or College timetable, or other schedules with the same classes every week. The schedule will start with the first day of your WordPress install, so you can customize it how you want. This timetable style doesn’t need filters to display the classes in a smart and user friendly way, but you can choose to use them if you want.

  • Classes are listed in a weekly timetable, with a column for each day
  • You can set your classes to be the same every week
  • Only the columns for days that have events will be displayed
  • Clicking on events will open a pop-up window, with text and images
  • You can assign as many Class Types, Teachers and Rooms as you need
  • Canceled events will be displayed with a shading pattern and are not clickable

With the Weekly Schedule style, one of our eight layout styles available, you can display your events in a weekly timetable, with a column for each day. Filters can be used to sort the events and the selection will reflect in the table, the columns with no events will disappear. If there are no classes matching the selection, and the selection in the filters if it is the case,  the table will be replaced with a custom “no classes available” message.

See this schedule on a blank page

Let’s see how this schedule was created

On the right, you can see an actual screenshot of the Schedule Builder for this timetable. You can create one yourself, in only a few minutes, with the following steps:

  • Enter a title for your schedule, something like the London College Winter Classes.
  • Select the Weekly Schedule style, great for a School, College or University schedule.
  • Choose your Schedule Contents. You can use the All option, to display Classes with any Type, Location or Instructor, or you can select the ones you need. In our example, we selected only the ones relevant to a School or College.
  • The Available Filters tabs work in the same way. You can make a selection different than the one you have for Schedule Contents. This way, you can restrict filtering exactly how you want. In our example, we do not use filters.
  • Use the Schedule Labels fields to name the Categories and Filters how you want. In this example, we changed the Location label to Class and the Instructor label to Teacher, to be relevant for a School schedule.
  • You can also customize other messages, like the one for no classes available.
  • On the right, you can choose how many days to display. In this example, we are using 1 Week, as all our events are repeated every week.
  • With the Display Options switchers you can choose to hide some of the info.
  • The Filters Options switchers allow you to show only the filters categories you want. In this example, we hide all filters.
  • Choose the position of the Filters, we are using Center in this example, but the filters are disabled.
  • Choose how the pop-up modal should look. We are using the Small Image option.
  • The Design Options allow you to choose the two colors of the schedule: one for the text and one for the special elements.

Your Schedule is Ready! You can add it with our
custom Visual Composer element or you can
use the auto-generated shortcode on the right.

Somebody in {{ getLocation(notification) }} has purchased
{{notification.at | timeago}}
×
Ask a Pre-Sale Question
Ask a Pre-Sale Question -

Unfortunately, none of our chat agents are available at this time. Please leave your pre-sale question in the field below and we will get back to you as soon as possible.

If you already are our client, you should open a support ticket here: http://curlythemes.com/support/request/